Your Shopping Basket
Your basket is empty.

Best Sellers
- Hofner Logo Self Adhesive Decal
- Epiphone Vintage Logo Waterslide Decal
- Vox Logo Self Adhesive Decal
- Gibson 40s Logo Self Adhesive Decal
- Gibson 70s Logo Self Adhesive
- Epiphone Vintage Self Adhesive
- Les Paul Model Self Adhesive
- Gibson Logo Faux Mother of Pearl Water Slide Decal
- Gibson Diamond Decal Pack Self Adhesive
- Gibson Split Diamond Self Adhesive Decal
Celluloid Pearl Inlay Instructions
DOC ID13
CELLULOID PEARL INLAY APPLICATION INSTRUCTIONS
Tools needed:
Craft knife or scalpel
Small flat chisel
Adhesive (epoxy resin or superglue)
Wood filler (car body filler works best)
80 grit sandpaper
120 grit sandpaper
600 grit sandpaper
Can of primer spray paint
Can of black spray paint (or what ever colour you choose)
Can of clear lacquer
Instructions and photos were taken from an actual inlay installation process
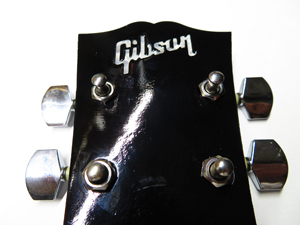
1. Place the inlay template onto the headstock as per diagram. Use some masking tape to hold position.
Use a sharp instrument such as a craft knife or scalpel to score around the edge of the inlay frame.
2. With a small flat chisle carve out the inside of the rectangle to 1.5mm depth.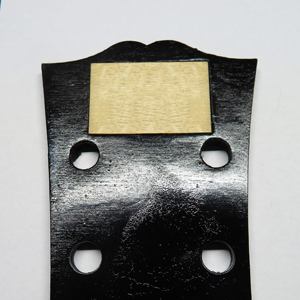
3. Position the inlay frame into the recess and make sure it is flush with the headstock.
If it is proud then shave a little more depth. Glue in the inlay template and let dry.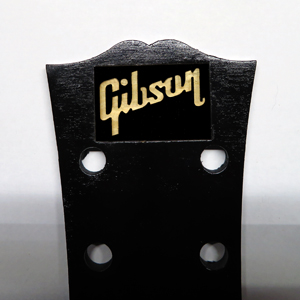
4. Use some wood filler, or better still automotive body filler around the edge of the template and headstock.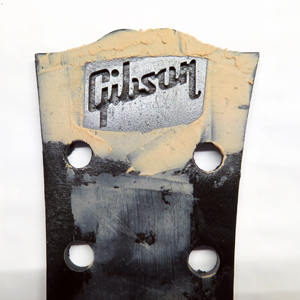
6. Rub down filler until flush and smooth. Use fine 600 grit sandpaper to get a smooth finish
Finish with primer and let dry overnight, then spary on the black coat and againleave overnight.
Finally spray several coats of clear lacquer, then glue in the pearl inlay.
Alternatively, you can glue in the pearl inlay and clear lacquer afterwards if prefered.